Modern mobile cameras now offer capabilities rivaling professional equipment. This guide reveals how to create a high-powered imaging system using everyday materials. For under $10 and 20 minutes of assembly, users gain access to microscopic exploration previously requiring costly lab gear.
The technique combines basic optical components with existing camera technology. Two layered lenses amplify viewing capacity to 375x magnification – enough to examine plant cells or insect anatomy. AI-powered zoom features in newer devices further enhance detail recognition without physical adjustments.
Educators find particular value in this approach. Schools can equip entire classrooms with functional scientific tools at minimal expense. Field researchers benefit from the system’s portability, conducting on-site analysis where traditional equipment proves cumbersome.
This innovation democratizes access to microscopic investigation. Hobbyists gain laboratory-grade capabilities while students develop practical STEM skills through hands-on experimentation. The setup maintains full device functionality, serving as both communication tool and scientific instrument.
Introduction: Revolutionizing Microscopy on a Budget
Advancements in everyday technology are reshaping scientific exploration for all. Over two million viewers have watched instructional videos detailing this high-powered imaging system, with educators and professionals across 40+ countries adopting the method. The approach eliminates barriers that would otherwise prevent access to laboratory-grade observation tools.
Schools and museums now use this technique to teach cellular biology and material science. One rural school district reported equipping 300 students for less than the cost of a single professional microscope. Field researchers praise the system’s adaptability, using modified versions to study soil samples and insect behavior in remote locations.
The project’s open-source design fuels continuous innovation. Makerspaces host workshops where participants improve lens alignment techniques or create 3D-printed stands. This collaborative spirit ensures the tool evolves to meet diverse needs – from classroom demonstrations to industrial quality checks.
By merging basic optics with modern devices, the conversion method makes science accessible to curious minds worldwide. It demonstrates how creative problem-solving can transform common tools into powerful research instruments, fostering STEM literacy without straining budgets.
Materials and Tools for a Smartphone Microscope Stand
Constructing a precision imaging device requires strategic material choices that balance cost and functionality. The components listed below ensure stability for high-magnification observation while keeping expenses under $15. Every element serves multiple purposes, from maintaining alignment to enabling precise adjustments.
Budget-Friendly Components
The plywood base forms the foundation, cut to 7″x7″ for optimal stability during use. Transparent plexiglass sheets create both the camera stage and specimen stage, allowing light transmission while resisting scratches. Carriage bolts with wing nuts enable smooth height adjustments without specialized tools.
A salvaged laser pointer lens becomes the magnifying element when properly positioned. The LED click light provides consistent illumination for viewing cellular structures. Washers prevent over-tightening during assembly, protecting delicate materials.
Essential Hardware and Software Tools
A standard drill with multiple bit sizes handles all necessary holes for lens mounting and component alignment. A metal ruler ensures accurate measurements when marking bolt positions on both stages. While physical tools dominate the assembly process, free measurement apps help verify scale accuracy during calibration.
The hardware selection emphasizes durability – stainless steel bolts resist corrosion from repeated handling. Nylon wing nuts allow finger-tight adjustments without marring surfaces. This combination creates a reliable platform that withstands daily educational or research use.
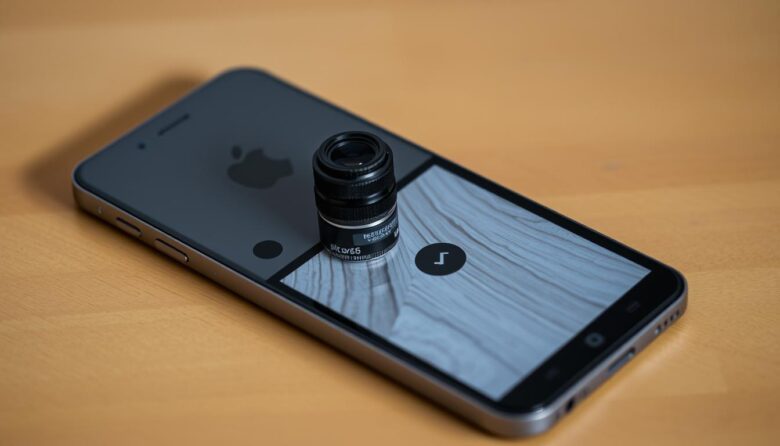
Extracting the Focus Lens from a Laser Pointer
Transforming a common laser pointer into a precision optical component begins with careful disassembly. Inexpensive models costing under $3 provide identical performance to premium versions for this application. The key lies in proper handling techniques to preserve the fragile glass element during extraction.
Step-by-Step Lens Removal Process
Safety first: Remove all batteries before starting. Unscrew both the front cone and battery compartment cap. Position the housing vertically with the front opening facing downward.
Insert a pencil’s eraser end into the rear opening. Apply gentle pressure to push internal components through the front. This method prevents scratches while ejecting the lens assembly.
Locate the small black plastic housing containing the focus lens. Rotate it counterclockwise to separate from surrounding parts. Avoid touching the lens surface directly – handle only by its edges to prevent oil transfer.
Note the curvature direction before removing the glass. Proper orientation during later installation ensures optimal light refraction. Store extracted components in an airtight container until assembly to minimize dust contamination.
Designing Your DIY Microscope Stand
Crafting a stable imaging platform begins with precise spatial planning. Proper alignment between components ensures crisp visuals at high magnification levels. The blueprint phase determines success, balancing structural support with optical precision.
Planning the Stand Layout and Measurements
Mark front corners ¾” from edges on the plywood base. This creates anchor points for securing the camera and specimen stages. Stacked plexiglass layers maintain alignment while allowing independent height adjustments.
The specimen stage extends ¾” beyond the base for easy slide handling. This offset prevents collisions with the camera during focus changes. Countersunk bolts keep the assembly flat, eliminating wobble during observation.
A 7″x7″ base provides stability without excessive bulk. This size accommodates most slides while fitting standard workspace areas. Modular construction enables upgrades – users can swap stages or add lighting without rebuilding the entire stand.
Precision measurements ensure light travels correctly through both stages. Even minor deviations distort images at 300x+ magnification. Careful planning transforms basic materials into a professional-grade imaging tool.
Building the Conversion Stand: Step-by-Step Guide
Precision assembly transforms basic components into a functional imaging system. Proper technique ensures stable magnification and repeatable results. Follow these critical steps to create a reliable platform for scientific observation.
Drilling and Assembling the Base and Stages
Secure the camera stage and base using clamps before drilling. Stack components to align bolt holes perfectly. A sacrificial wood block beneath prevents splintering during spade bit operations.
Counterbore holes under the base allow bolt heads to sit flush. This maintains stability while enabling smooth vertical adjustments. Test-fit components frequently to confirm alignment before final tightening.
Embedding the Lens and Aligning the Camera
Create a mounting point ¾” from the front two bolts on the camera stage top. Drill slightly smaller than the lens diameter for a friction fit. Enlarge gradually until the glass seats securely without gaps.
Position the device parallel to the specimen stage using wing nuts for micro-adjustments. Tighten rear bolts first to establish a stable plane. Final checks ensure light paths remain unobstructed during operation.
smartphone microscope DIY: Enhancing Your Mobile Device’s Capability
Combining everyday technology with scientific observation creates accessible learning tools. Modern devices transform into research instruments through simple modifications, empowering users to document discoveries instantly. The system’s touch controls simplify operation – even first-time users capture publication-grade images within minutes.
Automatic focusing systems handle precision adjustments as specimens shift position. This feature proves invaluable when examining moving organisms or adjusting magnification levels. Group learning thrives as multiple viewers observe real-time visuals on the screen, while projector connectivity expands audience capacity for classroom demonstrations.
Dynamic recording capabilities reveal processes invisible to the naked eye. Time-lapse videos track cellular division, while slow-motion captures rapid insect movements. Immediate file sharing through cloud platforms enables peer review and collaborative analysis across distances.
Portable power sources support extended field sessions without electrical access. Educators report increased student engagement when documenting local ecosystems firsthand. The hybrid design preserves standard communication functions, ensuring seamless transition between scientific work and daily device use.
Storage solutions eliminate physical media needs – thousands of high-resolution images fit in pocket-sized devices. This digital approach streamlines data organization, allowing quick comparisons between specimens. Users build permanent visual records to track changes over time or showcase discoveries.
Optimizing Magnification and Focus with AI Zoom
Combining physical optics with digital processing unlocks unprecedented observation power. Modern imaging systems achieve laboratory-grade resolution through layered magnification techniques. Proper configuration maintains clarity while pushing magnification limits beyond traditional optical constraints.
Utilizing Digital Zoom for Greater Detail
AI-enhanced zoom compensates for optical limitations through advanced interpolation. When paired with a single lens laser element, digital processing extends magnification to 175×. This hybrid approach reveals cellular membranes and mineral structures with striking precision.
Newer devices employ neural networks to sharpen magnified images. These algorithms analyze patterns to reconstruct missing details. Users maintain crisp visuals even when pushing beyond the lens’s native capabilities.
Stacking Lenses for Increased Magnification
Adding a second lens creates compound magnification through strategic alignment. Position two lenses vertically with ¼” spacing for optimal results. This configuration amplifies power to 375× – enough to examine bacterial colonies.
Dual plexiglass stages ensure proper lens focus distances. Maintain parallel alignment to prevent light distortion. Precision spacers help stabilize the setup during high-power observation sessions.
The technique requires meticulous calibration but delivers professional-grade performance. When combined with AI processing, this layered approach rivals expensive laboratory equipment in both clarity and versatility.
Troubleshooting and Fine-Tuning Your Microscope
Even well-built systems may need adjustments for peak performance. Common challenges often relate to specimen positioning and material handling. These solutions help maintain precision without expensive upgrades.
Resolving Focus and Light Issues
Blurry images usually mean the slide sits too far from the lens. Add thin plastic spacers under specimens if the stage won’t rise high enough. Transparent materials like leaves require backlighting – position the LED light directly under the viewing area.
For plant cells or other dense samples, tilt the light source at 45 degrees. This creates shadows that reveal cell walls and nuclei. Always make sure the illumination covers the entire sample area to avoid dark spots.
Preventing Cracked Plexiglass and Other Challenges
Drilling clear sheets demands patience. Apply masking tape where holes will go and use sharp bits at low speed. Let the tool’s weight create pressure instead of pushing – this prevents stress fractures.
Many hardware stores offer precise cutting for minimal fees. For repeated adjustments, replace wing nuts with thumb screws. These small upgrades transform basic setups into durable research tools capable of handling daily classroom use.